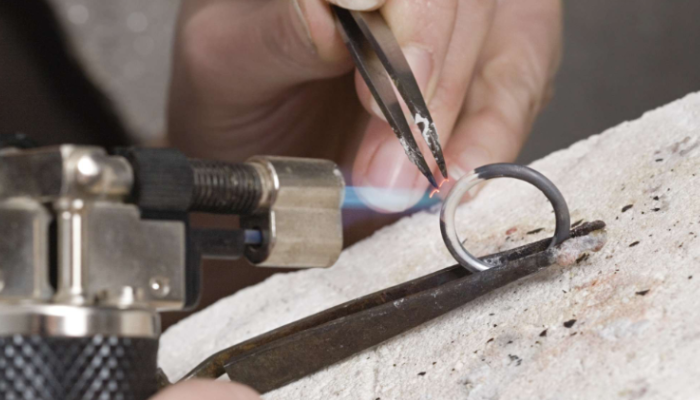
Jewellery soldering is a fundamental skill in the art of jewellery making and repair, offering endless possibilities for creativity and precision. Whether you’re a budding jeweller, a seasoned craftsperson, or simply curious about jewellery repair, understanding the different types of jewellery soldering and their uses can transform your approach to creating and fixing beautiful pieces. Let’s embark on a journey through the world of jewellery soldering, uncovering the secrets that will help you master this crucial skill.
The Basics of Jewellery Soldering: Laying the Foundation
Before we dive into the specific types of soldering, it’s crucial to understand the fundamentals. Soldering is the process of joining metal parts using a filler metal (solder) that melts at a lower temperature than the base metals being joined. This technique is vital in jewellery making and repair, allowing craftspeople to create intricate designs and restore damaged pieces.
Essential Tools and Materials
Jewellers use a few key items:
- Torch (propane or acetylene)
- Solder (in various forms like wire or sheet)
- Flux
- Tweezers and soldering picks
- Fireproof soldering surface
- Quenching bowl
- Safety equipment (goggles, heat-resistant gloves)
- Pickle solution for cleaning
- Borax or boric acid for additional flux
- Fine-grit sandpaper or files for surface preparation
Safety First: Precautions in Jewellery Soldering
Soldering involves high temperatures and potentially harmful fumes, so safety should always be the top priority. Here are some essential precautions jewellers use in their workshop:
- Work in a well-ventilated area or use a fume extractor
- Wear protective eyewear and heat-resistant gloves
- Keep a fire extinguisher nearby
- Be aware of your surroundings and flammable materials
- Use a proper soldering surface to prevent accidental fires
- Never solder on a wooden surface or near flammable objects
- Keep long hair tied back and avoid loose clothing
- Have a designated area for hot tools to cool down
- Always wash your hands after handling chemicals and metals
Remember, a safe jeweller is a successful jeweller.
Types of Jewellery Soldering Techniques
1. Torch Soldering: The Classic Method
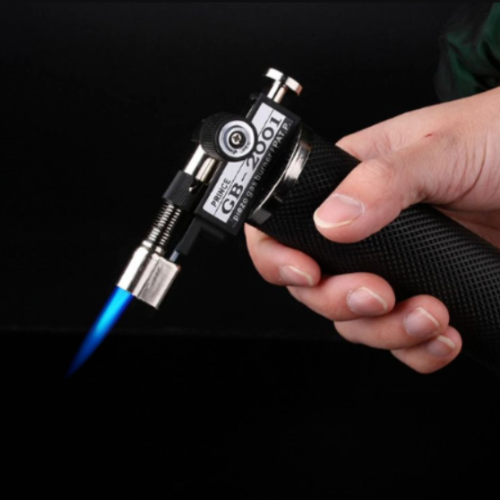
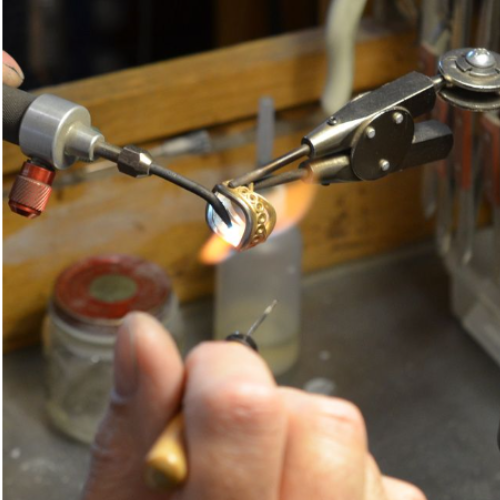
Torch soldering is the most traditional and widely used technique in jewellery making. It involves using a handheld torch to heat the metal and solder to their melting points.
How it works:
- Clean the metal surfaces to be joined
- Apply flux to prevent oxidation
- Position the solder and metals
- Heat with the torch until the solder flows
- Allow to cool and clean
Pros:
- Versatile and suitable for most jewellery projects
- Allows for precise control over heat application
- Cost-effective for small to medium-scale operations
- Portable and can be used in various settings
Cons:
- Requires skill and practice to master
- Can be challenging for heat-sensitive stones or materials
- Risk of overheating delicate pieces
Best applications: Torch soldering is ideal for creating custom jewellery pieces, repairing chains, and joining larger metal components. It’s particularly useful for:
- Creating rings and bangles
- Assembling pendants and earrings
- Attaching findings like clasps and jump rings
- Repairing broken jewellery items
2. Laser Soldering: Precision in Action
Laser soldering uses a focused beam of light to heat the metal and solder, offering unparalleled precision.
The technology behind it: Laser soldering machines emit a concentrated beam of light that heats a very small area. This allows for extremely precise soldering without affecting surrounding areas. The laser’s power and duration can be finely controlled, making it possible to work on even the most delicate pieces.
Advantages:
- Highly precise, ideal for delicate work
- Minimal heat exposure to surrounding areas
- Can be used on heat-sensitive materials
- No direct contact with the piece, reducing contamination risk
- Ability to solder very close to gemstones without removal
Disadvantages:
- Expensive equipment
- Requires specialised training
- Limited to smaller areas and joints
- May not be suitable for larger, heat-intensive jobs
When to use laser soldering: Choose laser soldering when working with intricate designs, heat-sensitive stones, or when precision is crucial. It’s particularly useful for jewellery repair work on high-end pieces. Specific applications include:
- Repairing prongs on stone settings
- Adding small decorative elements to existing pieces
- Working with thin or delicate metals
- Soldering near heat-sensitive gemstones
3. Resistance Soldering: The Power of Electricity
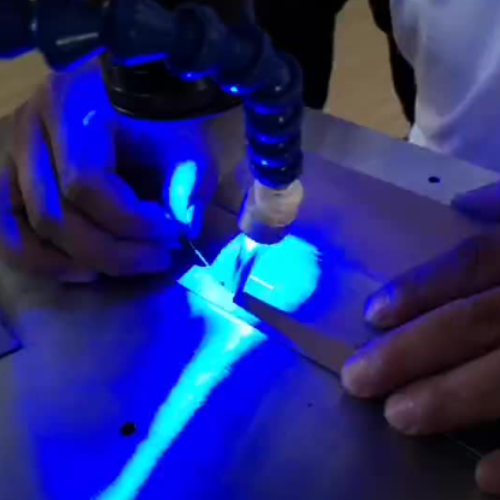
Resistance soldering uses electrical current to generate heat at the point of contact between two electrodes.
Understanding the process:
- Place the solder between the metals to be joined
- Position the electrodes on either side of the joint
- Apply electrical current, which heats the metals and melts the solder
- Remove the current and allow the joint to cool
Benefits:
- Quick and efficient for repetitive tasks
- Minimal heat spread to surrounding areas
- Suitable for thin materials and small components
- Consistent results in production settings
Limitations:
- Limited to smaller joints and components
- Requires specialised equipment
- Not suitable for all metal types
- May struggle with highly conductive metals like silver
Ideal scenarios: Resistance soldering shines in production settings where many small, similar joints need to be made quickly and consistently. It’s particularly useful for:
- Assembling small components in costume jewellery
- Attaching posts to earring backs
- Creating multiple identical pieces in a production line
- Working with very small or thin wires
Solder Types and Their Uses: Choosing the Right Material
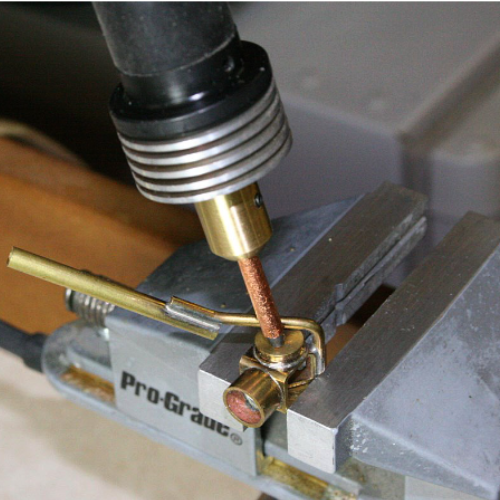
Understanding the different types of solder is crucial for successful jewellery soldering. Let’s explore the three main categories in depth:
1. Hard Solder: For Strong, Durable Joints
Composition and properties: Hard solder has the highest melting point among solders and creates the strongest joints. It typically contains a higher percentage of the base metal (e.g., silver or gold) and less alloy. This composition results in a joint that’s nearly as strong as the base metal itself.
When to use hard solder:
- For initial joints in a piece with multiple solders
- When maximum strength is required
- For larger components or load-bearing parts
- In areas that will undergo stress or repeated movement
Techniques for working with hard solder:
- Use a hotter flame to reach the higher melting point
- Apply heat evenly to both pieces being joined
- Be patient, as it takes longer to flow
- Ensure excellent fit between pieces to be joined
- Use more flux than with other solder types
Pro tip: When working with hard solder, it’s crucial to heat the entire area evenly. Focusing the heat on just the solder can lead to poor flow and weak joints.
2. Medium Solder: The Versatile Middle Ground
Characteristics and melting point: Medium solder falls between hard and easy solder in terms of melting point and strength. It offers a good balance of durability and ease of use, making it a popular choice for many jewellery applications.
Suitable applications:
- General-purpose jewellery making
- Adding components to a piece that already has hard-soldered joints
- When working with mixed metals
- For joints that require moderate strength
Tips for successful medium soldering:
- Clean surfaces thoroughly to ensure good flow
- Use flux generously to prevent oxidation
- Heat both pieces evenly before applying solder
- Watch for the characteristic “flow” of the solder into the joint
- Allow the piece to cool naturally for the strongest bond
3. Easy Solder: For Delicate Work and Finishing Touches
What makes it “easy”: Easy solder has the lowest melting point, making it flow quickly and easily. It contains more alloy and less of the base metal, which lowers its melting temperature but also reduces its overall strength compared to hard and medium solders.
Best uses in jewellery making:
- Final joints in a multi-step piece
- Repairing thin or delicate items
- Working with heat-sensitive components
- Filling small gaps or seams
- Touch-ups and quick repairs
Tricks for perfect easy soldering:
- Use a lower flame temperature to avoid overheating
- Apply heat carefully to avoid melting previous joints
- Be ready to remove heat quickly once the solder flows
- Use minimal solder to prevent excess buildup
- Consider using solder paste for precise application
“Choosing the right solder is like selecting the perfect ingredient for a recipe. It can make or break your jewellery piece.” – The Jewellery Mechanic
Choosing the Right Soldering Method
Selecting the appropriate soldering technique and solder type is crucial for successful jewellery making and repair. Consider these factors:
- Metal type: Different metals require different soldering approaches due to their unique properties and melting points.
- Joint strength requirements: Consider the stress the joint will endure in everyday wear.
- Complexity of the piece: Intricate designs may benefit from more precise methods like laser soldering.
- Heat sensitivity: Some components, such as certain gemstones or enamel work, may require low-heat techniques.
- Size and thickness of the components: Larger pieces may require torch soldering, while tiny components might benefit from resistance soldering.
- Production volume: For mass-produced items, resistance soldering might be more efficient.
- Budget and available equipment: Consider the cost and accessibility of different soldering methods.
Matching Solder Type to Metal
This table is a quick reference for choosing the right solder:
| Metal | Recommended Solder Type | Notes |
| Fine Silver | Fine Silver or Sterling Silver Solder | Fine silver solder for purest joints |
| Sterling Silver | Sterling Silver Solder | Use matching alloy for best colour match |
| 9ct Gold | 9ct Gold Solder | Always match carat to base metal |
| 18ct Gold | 18ct Gold Solder | Higher carat gold requires more careful heating |
| Platinum | Platinum Solder | Requires very high temperatures |
| Base Metals | Specific base metal solders | Use manufacturer-recommended solders |
Combining Different Soldering Techniques
For complex pieces, a combination of soldering methods might be required. For example:
- Use torch soldering for larger components and initial structure
- Switch to laser soldering for adding delicate details or working near stones
- Finish with resistance soldering for any repetitive small joints
- Use easy solder for final touches or repairs
This multi-technique approach allows the jeweller to leverage the strengths of each method, resulting in a piece that’s both structurally sound and finely detailed.
Common Soldering Challenges and Solutions
Even experienced jewellers face challenges when soldering. Here are some common issues and how to address them:
Preventing Fire Scale
Fire scale is a dark discoloration that occurs when copper in alloys oxidises during heating. It can be a persistent problem, especially with sterling silver. To prevent it:
- Use a protective flux generously
- Work in a reducing flame (slightly yellow, not blue)
- Consider using an oxygen-free soldering environment
- Use anti-firescale products or add a thin layer of fine silver to the surface
If fire scale does occur, it can be removed through polishing or by using commercial fire scale removers. In severe cases, you may need to re-plate the piece.
Dealing with Heat-Sensitive Stones
When working with pieces that include gemstones, protect them from heat damage:
- Remove stones if possible before soldering
- Use heat-sinking techniques (e.g., wet paper towels or heat-absorbing gels)
- Opt for laser soldering for precision heat control
- If stones can’t be removed, use heat shields or protective pastes
- Always know the heat tolerance of the stones you’re working with
Remember, some stones (like opals or pearls) are extremely heat-sensitive and should always be removed before soldering.
Fixing Solder Joint Failures
If a joint fails, don’t panic. Here’s what to do:
- Clean the area thoroughly, removing all old solder and flux
- Examine the joint to understand why it failed (poor fit, insufficient heat, etc.)
- Reapply flux
- Add a small amount of fresh solder
- Reheat carefully, ensuring even heat distribution
- If the joint repeatedly fails, consider reinforcing it with a support or redesigning the connection
Tackling Tricky Angles and Hard-to-Reach Spots
For challenging soldering locations:
- Use specialised soldering picks or tweezers for precise solder placement
- Create custom jigs to hold pieces in place (wire, ceramic blocks, or heat-resistant clamps)
- Consider using a helper hand tool for stability
- For internal joints, use solder wire fed through small holes
- In extreme cases, consider disassembling the piece for better access
Advanced Soldering Techniques
Sweat Soldering
This technique involves pre-placing solder on one surface before joining. It’s great for larger flat surfaces or when you need precise solder placement.
Steps for sweat soldering:
- Clean both surfaces thoroughly
- Apply flux to one surface
- Heat the surface and apply solder, allowing it to flow evenly
- Cool and clean the soldered surface
- Position the second piece and reheat until the solder flows between them
Sweat soldering is particularly useful for attaching backplates or creating seamless joins in sheet metal work.
Step Soldering
Step soldering allows you to create multiple joints on a single piece without disturbing previous work. It involves using solders with progressively lower melting points for each joint.
The step soldering process:
- Begin with the highest temperature solder (hard solder)
- Complete subsequent joints with medium solder
- Finish with easy solder for final connections
This technique is invaluable for complex pieces with multiple components, allowing you to build up a piece gradually without risking earlier work.
Wire Soldering
Soldering wire can be tricky due to its small surface area. Use these tips:
- Create a small divot in your soldering block to hold the wire in place
- Apply flux and solder sparingly to avoid overflow
- Heat from underneath for better flow
- For very fine wires, consider using a resistance soldering unit
- Practise good heat control to avoid melting thin wires
Wire soldering is essential for creating intricate designs, filigree work, and repairing chain jewellery.
Soldering Different Metals: A Comprehensive Guide
Each metal has its quirks when it comes to soldering. Here’s a detailed guide:
Gold Soldering Specifics
Gold soldering requires attention to detail and an understanding of karat compositions:
- Use a solder that matches the karat of your gold for colour consistency
- Be aware that higher karat gold is softer and more heat-sensitive
- Use a borax-based flux for best results
- For two-toned pieces, solder the higher karat gold first
- Clean thoroughly between soldering operations to prevent contamination
Tip: When soldering gold, pay close attention to the flame colour. A reducing flame (with a slight yellow tinge) can help prevent oxidation.
Silver Soldering Tips
Silver is a popular choice for jewellery but comes with its own challenges:
- Sterling silver is prone to fire scale, so use protective flux liberally
- Silver conducts heat quickly, so be careful not to overheat
- Clean thoroughly after soldering to remove any flux residue
- For fine silver, you can often join pieces through fusing rather than soldering
- Consider using argentium silver for its tarnish-resistant properties
Pro tip: When soldering silver, the piece will often glow a salmon pink colour just before the solder flows. This is your cue to be ready to remove the heat.
Working with Platinum
Platinum soldering is challenging due to its high melting point:
- Platinum requires much higher temperatures than gold or silver
- Use a specialised platinum solder
- Consider using a laser soldering machine for precision
- Ensure your workspace is immaculately clean to prevent contamination
- Be prepared for longer heating times and use oxygen-acetylene torches for best results
Soldering Mixed Metals
When working with different metals in one piece:
- Use a solder compatible with both metals (often a gold solder works well)
- Be aware of the different melting points and adjust your technique
- Consider using a barrier layer between dissimilar metals to prevent galvanic corrosion
- Always solder the higher melting point metal first
- Be cautious of thermal expansion differences which can cause stress in the finished piece
Post-Soldering Processes: Finishing Your Masterpiece
After soldering, the work isn’t quite done. These post-soldering steps are crucial for a professional finish:
- Cleaning: Remove any flux residue with warm water and a soft brush. For stubborn residue, use a pickle solution (diluted sulfuric acid or citric acid) to clean the metal thoroughly.
- Checking Joint Strength: Gently test the joint to ensure it’s secure. Apply slight pressure or use tools appropriate for the piece to verify the soldering was successful.
- Polishing: Use appropriate polishing compounds to restore shine. Start with coarser grits and work your way to finer ones for a mirror finish.
- Final Inspection: Look for any imperfections or areas needing touch-up. Check for symmetry, smooth edges, and overall quality.
- Patina Application: If desired, apply chemical patinas to enhance design elements or achieve an aged look.
- Final Polish: Give the piece a final polish with a soft cloth to bring out its full lustre.
- Stone Setting: If you removed any stones before soldering, now is the time to reset them.
Remember, the post-soldering process is just as crucial as the soldering itself. It’s what transforms a well-constructed piece into a polished, professional work of art.
Eco-Friendly and Health-Conscious Soldering Practices
As awareness of environmental and health issues grows, consider these practices:
- Use of low-fume fluxes to reduce harmful emissions
- Opt for lead-free solders when possible
- Ensure proper ventilation in your workspace, using fume extractors if necessary
- Dispose of waste materials responsibly, including pickle solutions and metal scraps
- Consider using natural flux alternatives like citric acid or boric acid
- Implement a recycling system for metal scraps and filings
- Use energy-efficient equipment and LED lighting in your workspace
By adopting these practices, you not only protect your health but also contribute to a more sustainable jewellery industry.
Case Study: The Jewellery Mechanic’s Soldering Success
Let’s look at how a professional jeweller, The Jewellery Mechanic, approached a challenging repair:
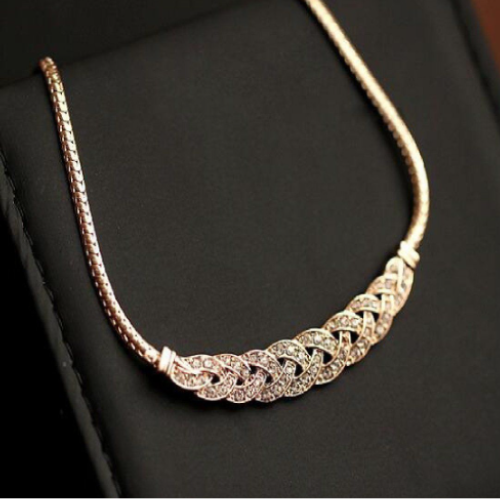
The Problem: A customer brought in a valuable antique necklace with a broken clasp, several loose stones, and a cracked section.
The Solution:
- The Jewellery Mechanic chose laser soldering to repair the delicate clasp without risking heat damage to the nearby stones.
- For resetting the loose stones, they used a combination of torch soldering for larger settings and resistance soldering for the smallest ones.
- Throughout the process, they used a variety of solder types to ensure each joint had the appropriate strength.
- The cracked section was carefully soldered. The necklace was fully inspected under magnification and cleaned and polished.
The Process:
- Documented the piece thoroughly with photos
- Removed loose stones
- Cleaned the metal surfaces meticulously
- Used laser soldering to repair the clasp, controlling heat precisely
- Employed torch soldering with hard solder for reinforcing larger stone settings
- Applied resistance soldering for the most delicate connections
- Reset all stones and performed a final polish
The Result: The necklace was restored to its former glory, with strong, nearly invisible repairs that preserved its antique value. The customer was thrilled with the seamless restoration that maintained the piece’s historical integrity.
This case study illustrates the importance of choosing the right soldering technique for each specific task within a project, as well as the value of having a diverse skill set in jewellery repair.
Conclusion: Mastering the Art of Jewellery Soldering
Understanding the various types of jewellery soldering is essential for anyone in the craft, from beginners to seasoned professionals. Techniques like torch, laser, and resistance soldering each have their unique place in jewellery making and repair. While mastering these skills is rewarding, knowing when to seek professional help is crucial. For intricate repairs or valuable pieces, trusting experts like The Jewellery Mechanic ensures that your jewellery is handled with care and precision. Their blend of traditional methods and modern technology guarantees top-notch results. Whether you’re creating, repairing, or simply learning, jewellery soldering is a vital skill that connects you to a long tradition of artistry and craftsmanship.
